How To Download Cave Dweller Mod in Minecraft (Step-by-Step Guide 2025)
 mcpecentraladmin
If you’ve ever wanted to make your Minecraft world scarier and more exciting, the Cave Dweller Mod is a must-try! This terrifying mod introduces a mysterious creature that lurks deep underground — waiting for unsuspecting players to explore the dark. In this complete guide, you’ll learn how to download and install the Cave Dweller Mod in Minecraft (with all required files and links).
Whether you’re on Minecraft 1.20, 1.19, or earlier versions, follow these simple steps to get the mod running perfectly!
Step 1: Download the Cave Dweller Mod
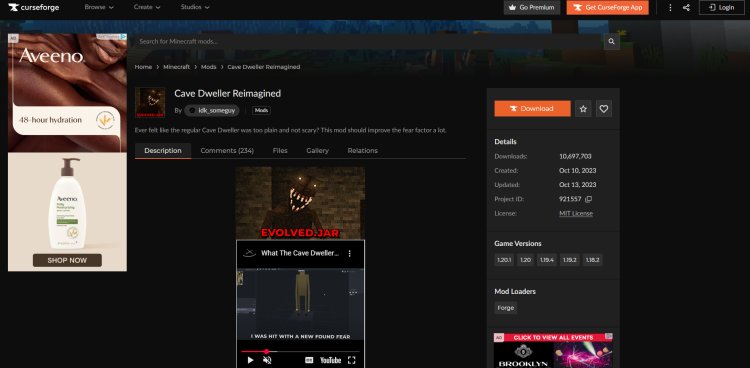
To start, download the Cave Dweller Mod from the official CurseForge page:
Download Cave Dweller Mod (CurseForge)
Make sure you select the version of Minecraft that matches the one you plan to play. Using the wrong version can cause crashes or errors.
Step 2: Download Geckolib (Required Dependency)

The Cave Dweller Mod requires another mod called Geckolib to run correctly. This library handles the animations and models for the Cave Dweller creature.
Download Geckolib Mod (Modrinth)
⚠️ Important: Download the same Minecraft version of Geckolib as the Cave Dweller Mod you downloaded in Step 1.
⚙️ Step 3: Install Minecraft Forge
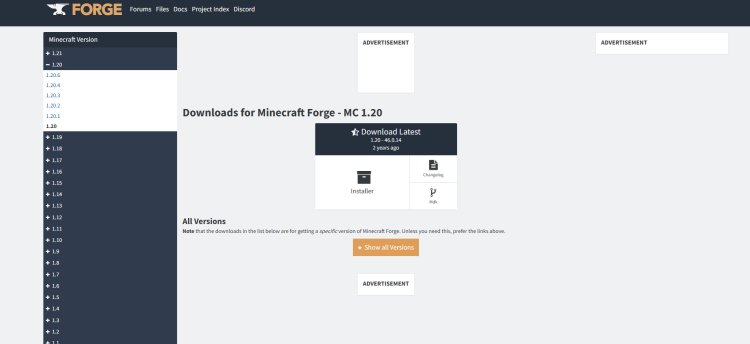
Next, you’ll need Minecraft Forge, the most popular mod loader for Minecraft Java Edition. It’s what allows mods like Cave Dweller to run smoothly.
Choose the correct version of Forge that matches your mod and Minecraft version (for example, Forge 1.20 for Minecraft 1.20).
☕ Step 4: Download Java 21

Minecraft Forge and most mods require the latest version of Java to work properly. Java 21 is currently recommended for Minecraft modding.
???? Download Java 21 (Oracle)
Install Java 21 on your computer — this ensures that Forge runs without errors during installation or gameplay.
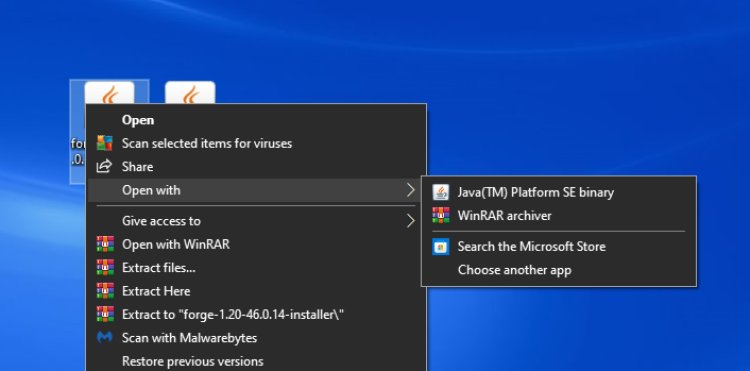
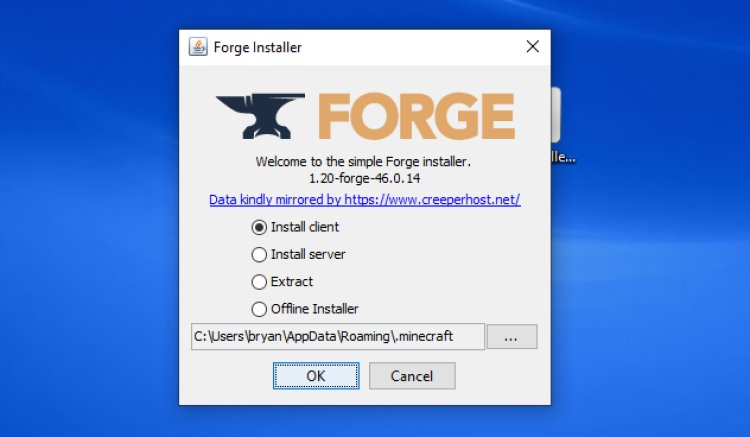
Step 5: Install Forge on Your Computer
Once Java is installed:
-
Locate the Forge installer you downloaded.
-
Right-click it and select “Open with Java.”
-
In the installer window, select “Install Client.”
-
Wait for the setup to complete — you’ll get a success message once it’s done!
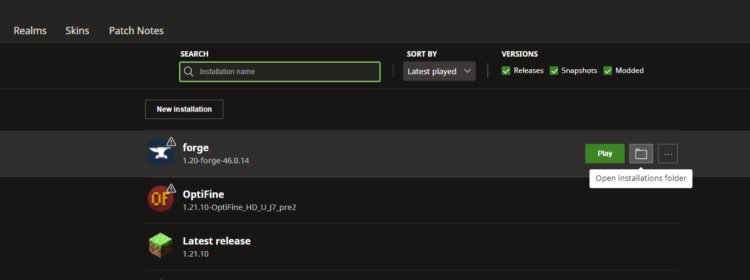
Step 6: Open the Minecraft Launcher

Now, open your Minecraft Launcher.
-
In the Installations tab, you should see a profile called Forge.
-
Select it, then click Play once everything is ready.
This will generate a mods folder automatically inside your Minecraft directory.
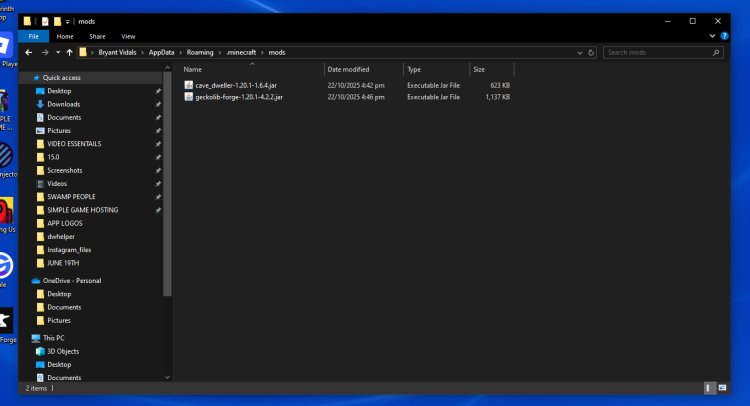
Step 7: Add the Cave Dweller and Geckolib Mods
Here’s the fun part!
-
Press Windows + R and type
%appdata%\.minecraft\mods -
Open the mods folder.
-
Drag and drop both Cave Dweller Mod (.jar) and Geckolib (.jar) into this folder.
Make sure both files are in the same version of Minecraft Forge.
Step 8: Launch Minecraft and Enjoy the Horror!
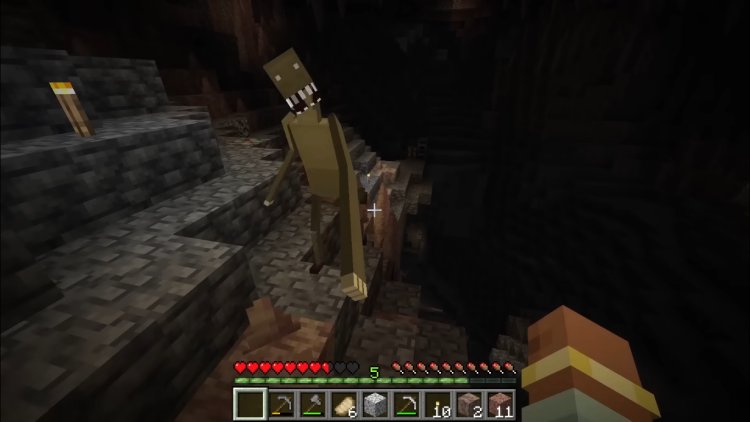
Open the Minecraft Launcher again and select the Forge installation. Once in-game, you should see both Cave Dweller and Geckolib listed under the Mods menu.
Now, start a new world or enter an existing one — and prepare yourself. The Cave Dweller may appear when you least expect it!
Final Tips for Installing Cave Dweller Mod
-
Always match mod versions (Cave Dweller, Geckolib, and Forge).
-
If Minecraft crashes, double-check that you have Java 21 installed.
-
Avoid mixing mods made for different Minecraft versions.
⭐ Why You’ll Love the Cave Dweller Mod
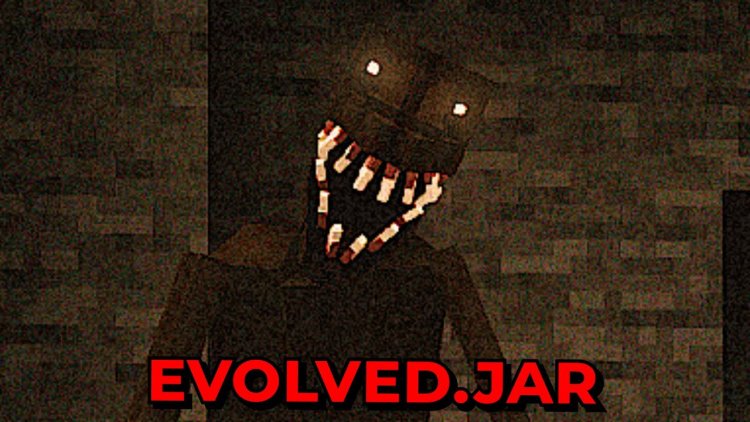
The Cave Dweller Mod adds a whole new level of fear and excitement to Minecraft survival. With realistic sounds, haunting chases, and an unpredictable AI, it’s one of the best horror mods for Minecraft in 2025.
Whether you’re making a YouTube video or just exploring the caves with friends, the Cave Dweller Mod will keep you on edge — every single minute.