How To Make a FREE Server In Minecraft 1.21.5!
 mcpecentraladmin
Are you ready to create your own Minecraft server in version 1.21.5 completely for free? Whether you want to play with friends, build a private world, or experiment with custom settings, setting up a Minecraft server is easier than you think!
Why Create a Minecraft 1.21.5 Server?
Running your own Minecraft server gives you full control over gameplay, rules, and who gets to join. With Minecraft 1.21.5 being the latest version (as of March 28, 2025), you’ll enjoy all the newest features and updates. Plus, it’s free to set up if you host it on your own computer! This guide is perfect for beginners and seasoned players alike, so let’s get started.
Step 1: Download the Minecraft Server File

To begin, you’ll need the official Minecraft server software. Follow these steps:
- Visit the official Minecraft website: https://www.minecraft.net/en-us/download/server.
- Locate the download link for the Minecraft Server JAR file (e.g., server.jar) compatible with version 1.21.5.
- Click to download it to your computer.
SEO Tip: Always download from the official site to ensure safety and compatibility with Minecraft 1.21.5.
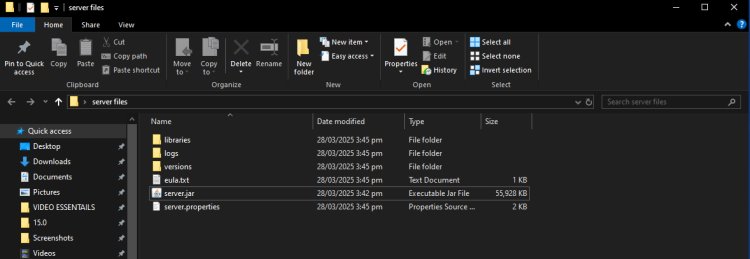
Step 2: Create a Server Folder

Organization is key when setting up your server. Here’s what to do:
- Go to your desktop (or any preferred location).
- Right-click and create a new folder—name it something like “Minecraft Server 1.21.5” for clarity.
- Drag and drop the downloaded server.jar file from Step 1 into this folder.
This folder will house all your server files, keeping everything neat and accessible.
Step 3: Install Java for Minecraft Server

Minecraft servers run on Java, so you’ll need to install it to open the server.jar file. Here’s why and how:
- Why Java? The Minecraft server software is written in Java, and without it, your computer won’t be able to execute the JAR file.
- Download Java 21 (recommended for 1.21.5) from the official site: https://www.oracle.com/java/technologies/downloads/#java21.
- Choose the version compatible with your operating system (Windows, macOS, or Linux), then install it by following the on-screen instructions.
Pro Tip: Ensure Java is updated to avoid compatibility issues with Minecraft 1.21.5.
Step 4: Fix Java Errors with Jarfix (Optional)
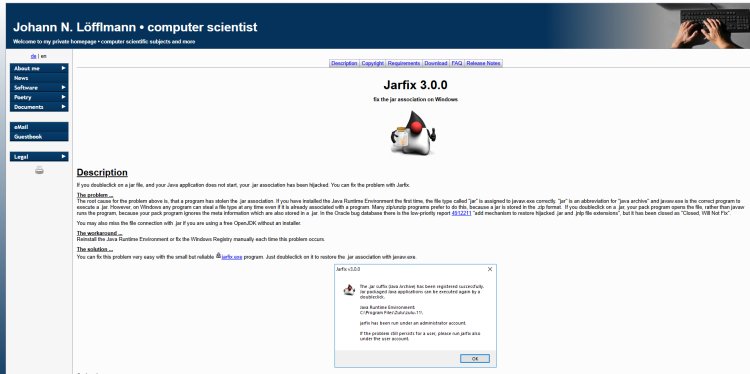
If you double-click server.jar and it doesn’t open (or opens as a ZIP file), Java might not be properly associated with JAR files. Here’s the fix:
- Download Jarfix from: https://johann.loefflmann.net/en/software/jarfix/.
- Run the jarfix.exe file and let it repair the file association.
- Try opening server.jar again after this step.
This quick tool ensures Java works seamlessly with your Minecraft server.
Step 5: Run the Server for the First Time
Now it’s time to launch your server:
- Open your server folder from Step 2.
- Double-click the server.jar file.
- A command window will appear, and new files and folders (like world, logs, and eula.txt) will generate in the folder.
Don’t worry if the server stops—it’s waiting for you to accept the End User License Agreement (EULA).
Step 6: Accept the Minecraft EULA

To make your server fully operational, you need to agree to Minecraft’s terms:
- In your server folder, find the file named eula.txt and open it with a text editor (like Notepad).
- Scroll to the last line, which says eula=false.
- Change it to eula=true, then save and close the file.
This step is mandatory to run your Minecraft 1.21.5 server legally.
Step 7: Customize Your Server Settings
Want to tweak your server? You can edit its settings:
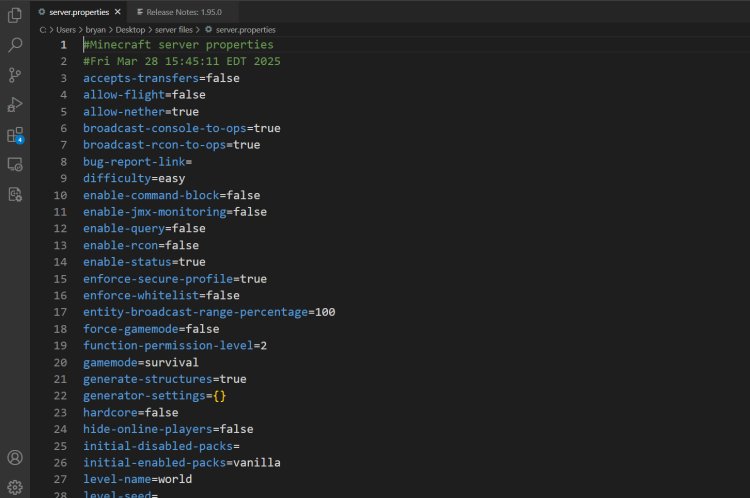
- Open the server.properties file in your server folder with a text editor.
- Adjust settings like:
- gamemode=survival (or creative, adventure, etc.).
- difficulty=normal (easy, hard, etc.).
- pvp=true (enable or disable player vs. player combat).
- Save the file after making your changes.
This step lets you personalize your Minecraft 1.21.5 server to match your playstyle!
Step 8: Start Your Minecraft Server

With everything set up, launch your server:
- Double-click server.jar again.
- The command window will show the server starting up—wait until you see “Done” in the log.
- Your Minecraft 1.21.5 server is now running!
Keep this window open while the server is active. Closing it will shut down the server.
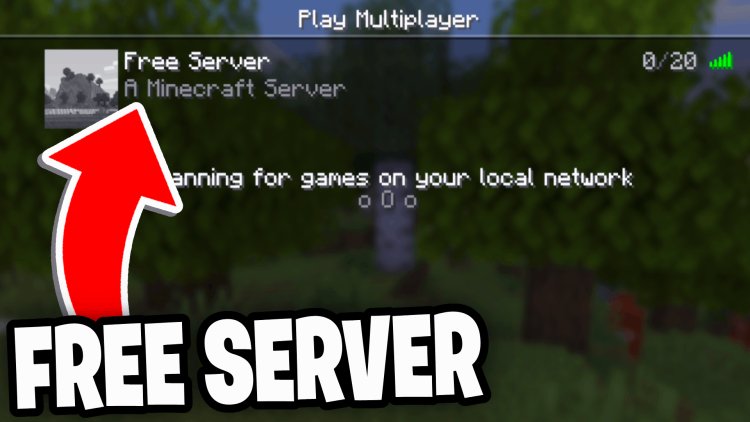
Step 9: Join Your Server and Play
Time to jump in and enjoy your creation:
- Open the Minecraft Launcher on your computer.
- Ensure you’re running Minecraft 1.21.5 (select it from the version dropdown if needed).
- Click “Multiplayer,” then “Add Server.”
- Enter “localhost” as the server IP address and name it whatever you like.
- Click “Join Server” and start playing!
Note: “localhost” works because the server is running on your own computer. To invite friends, you’ll need to share your public IP and port-forward—check out a separate guide for that!
Conclusion: Enjoy Your Free Minecraft 1.21.5 Server!
Congratulations—you’ve just learned how to make a Minecraft server in 1.21.5 for free! This simple, no-cost setup lets you explore, build, and play in a world tailored to your preferences. Whether you’re hosting a solo adventure or planning to invite friends, your server is now ready to go.
Looking to expand your server? Research port forwarding or consider free hosting services for 24/7 uptime. For now, jump in, have fun, and let us know how it goes in the comments below!